Nothing beats a fresh loaf of homemade bread slathered with homemade jam! You can start with this simple no-knead bread, or move all the way into sourdough bread territory. The type of bread you make will determine the ingredients, technique, and time.
Let’s Make Bread!
Baking bread is really all about practice, the more you do it at home and experiment, the more confident you will become. I recommend starting with a simple homestyle loaf like my Grandma’s Perfect Homemade Bread. With a little work and some patience, you will be a bread-baking pro in no time!! Knowing how to make homemade bread is a very useful skill! Bread is one of those staple grocery items you always need to have on hand. We love to use homemade bread for toast, sandwiches, and French toast! We even love it just warm with my easy honey butter.
Basic Bread Ingredients
At its core, bread consists of 4 simple ingredients; flour, water, salt, and yeast. Working with yeast can be intimidating, but don’t you worry! My How to Bake with Yeast post is extremely helpful if you have any questions!
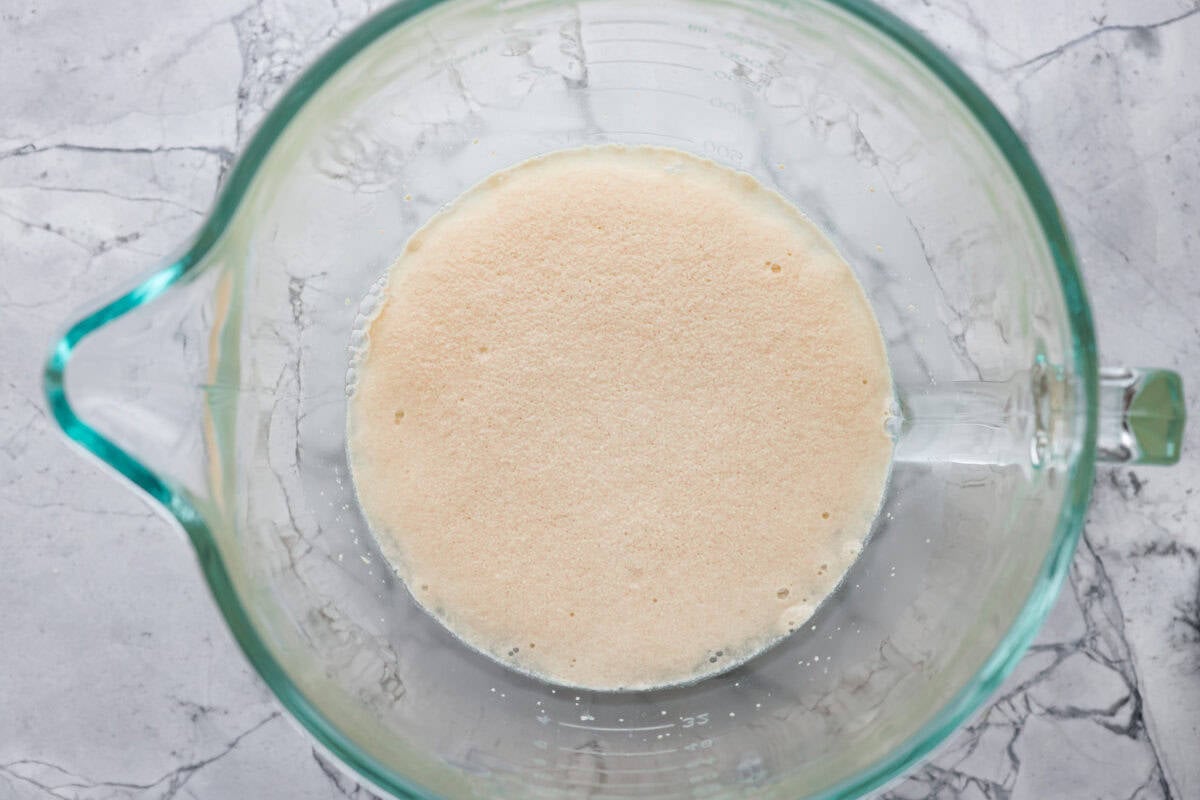
Water: The ideal temperature for the water or liquid in your dough is between 90-110 degrees Fahrenheit. If you are unsure, use a thermometer to test the temperature. Flour: Use all-purpose flour, whole wheat flour, bread flour, or whole wheat white flour. Salt: Adds flavor and also tightens the gluten structure by adding strength to the dough and keeping the yeast from being too active. Yeast: For a simple bread recipe, I suggest using a rapid rise or active dry yeast.
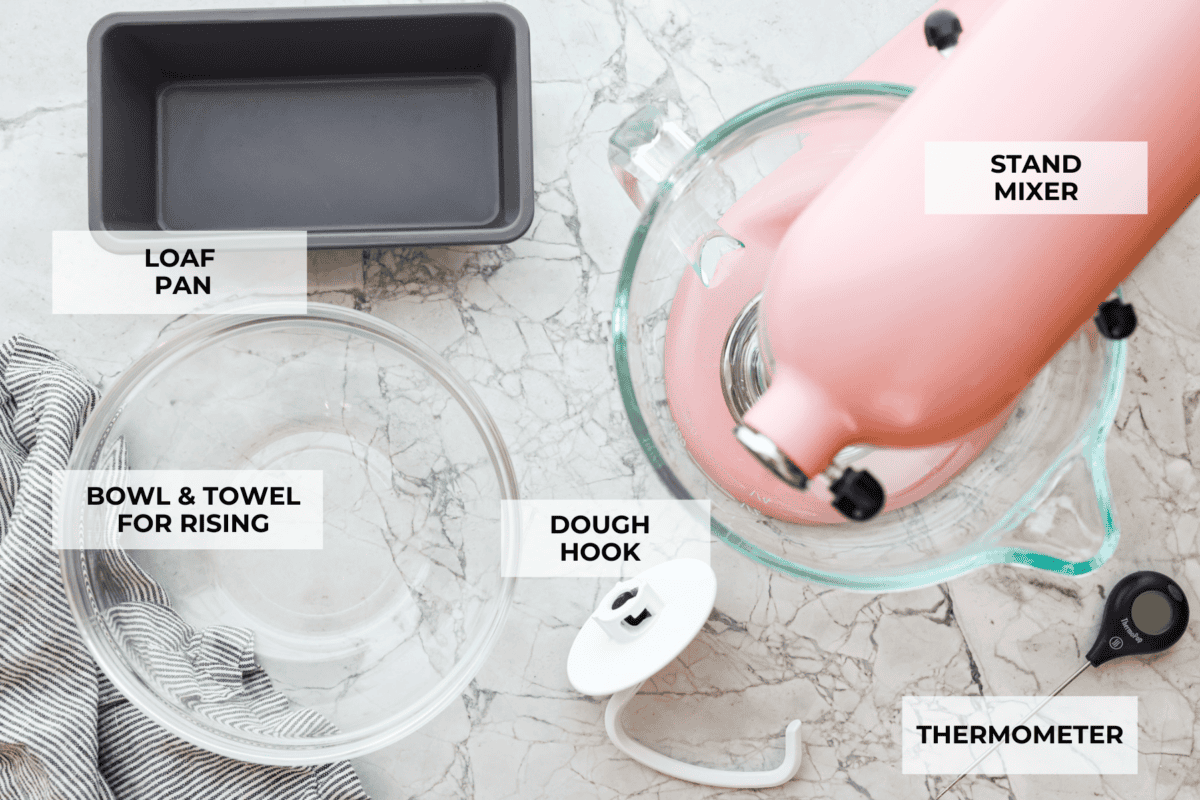
Tools Needed to Make Bread
How to Make Bread
There are 8 common steps you need to know when making homemade bread! Some bread recipes can vary, but a typical bread recipe will have the following steps. I walk you through every step with this beginner’s guide to baking bread.
Bread Flour: Bread flour is the easiest flour to use and it guarantees a good finished product! It’s specifically formulated to be full of the nutrients the yeast needs to work its magic. Bread flour has more proteins in it that make a big difference when it comes to developing strong gluten, creating a sturdy texture. All-Purpose Flour: All-purpose flour is the most common flour to use for basic loaves. It’s easy to find and is a tried and true flour time and time again. Whole Wheat Flour: Whole wheat flour has the highest percentage of protein. Since it isn’t ground as finely as other flours, it typically makes a heavier texture, not as airy. White Whole Wheat Flour: White whole wheat is made from white spring wheat, it’s lighter in color, and still has a high protein percentage but is ground finer so it yields a lighter loaf than regular whole wheat.
How to Knead Dough
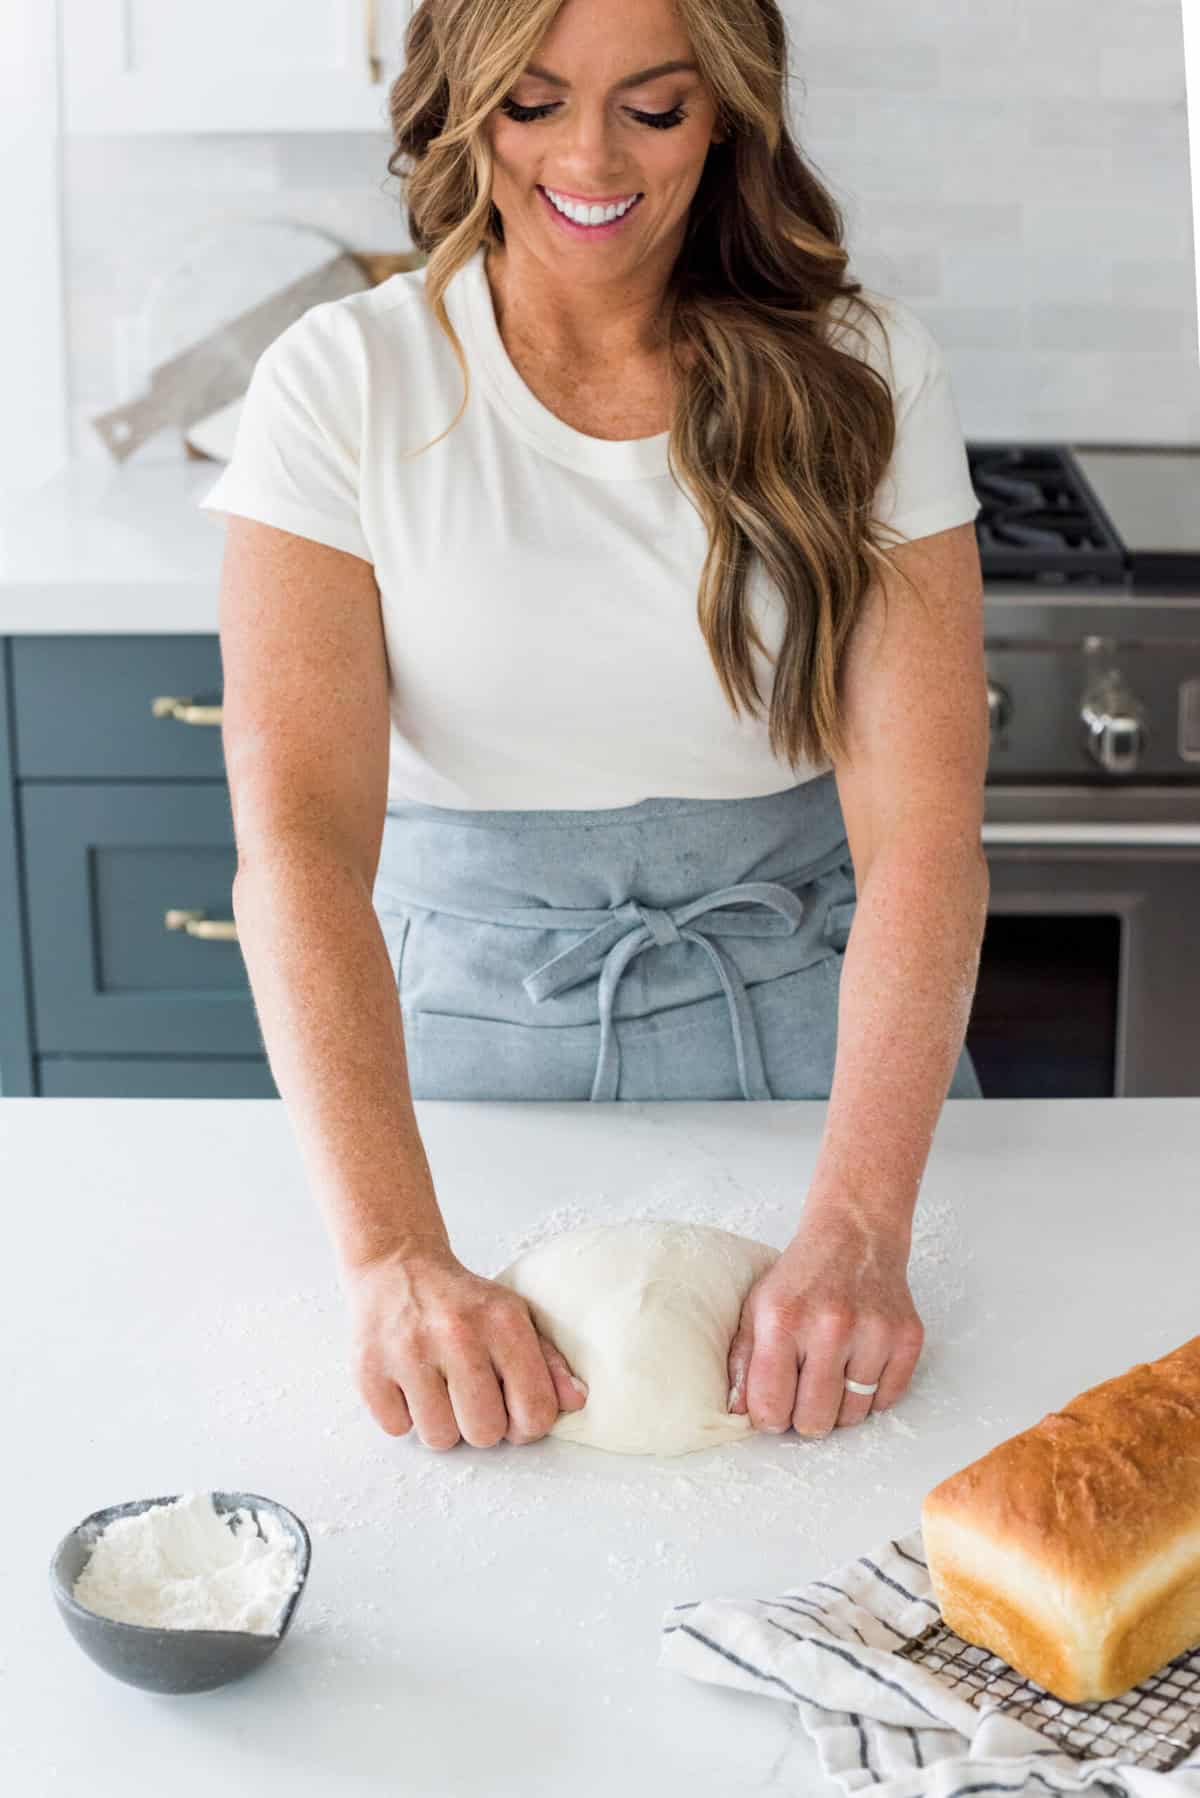
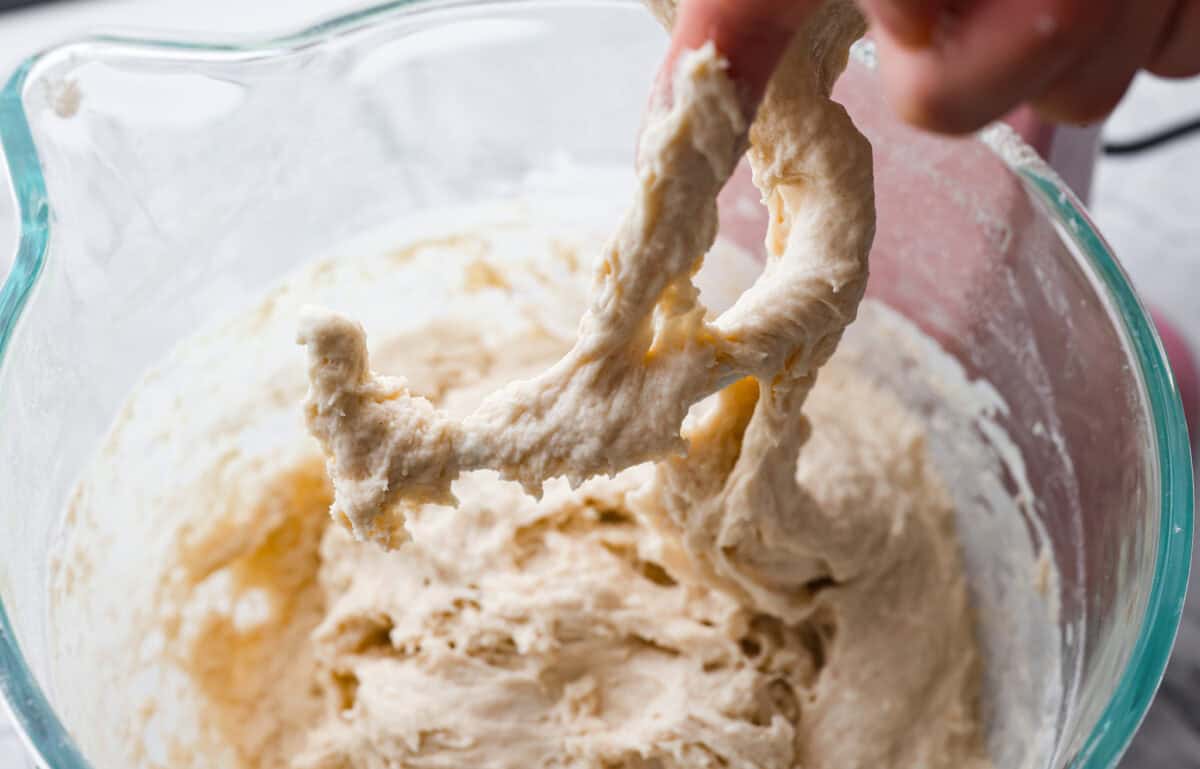
I knew I wanted to include kneading instructions in this beginner’s guide to baking bread because knowing how to knead dough can be intimidating. There are two kinds of ways to knead your dough. The easiest way is in the stand mixer using the dough hook. The stand mixer does all the work. If you don’t have a stand mixer, kneading can be done by hand. Follow my instructions below to help you with the kneading process.
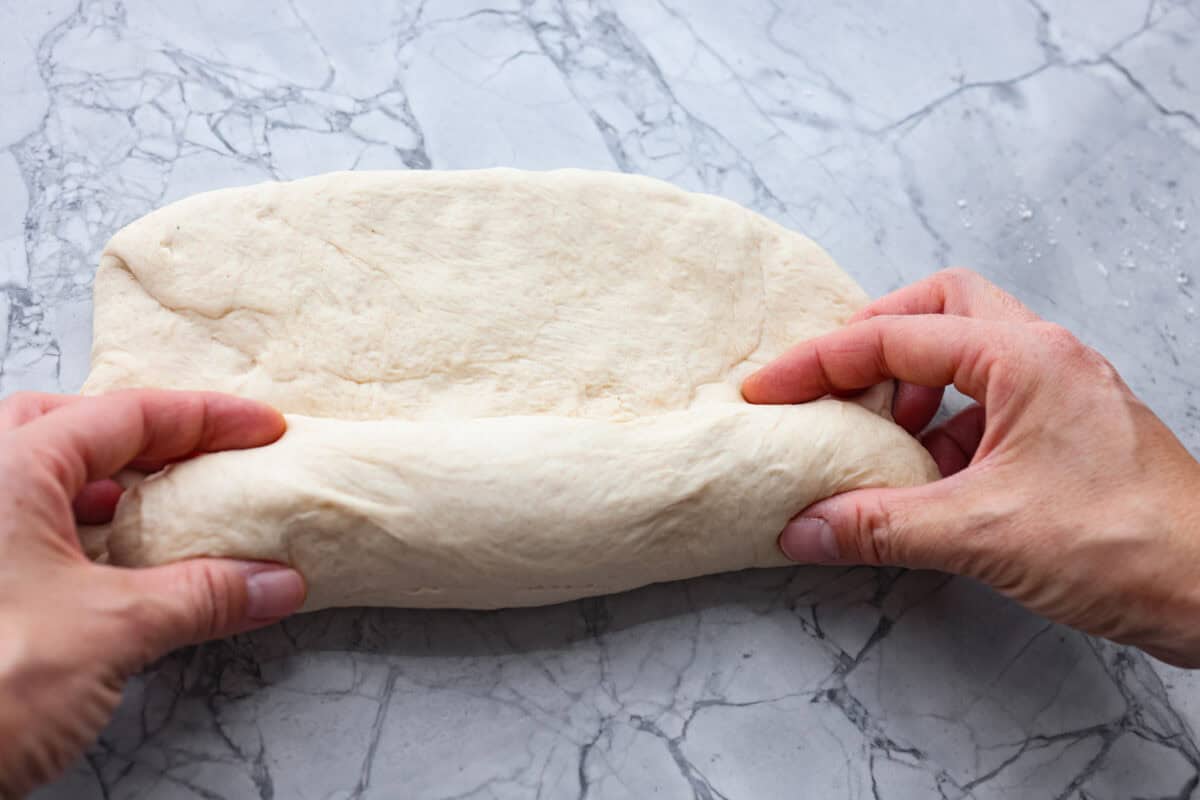
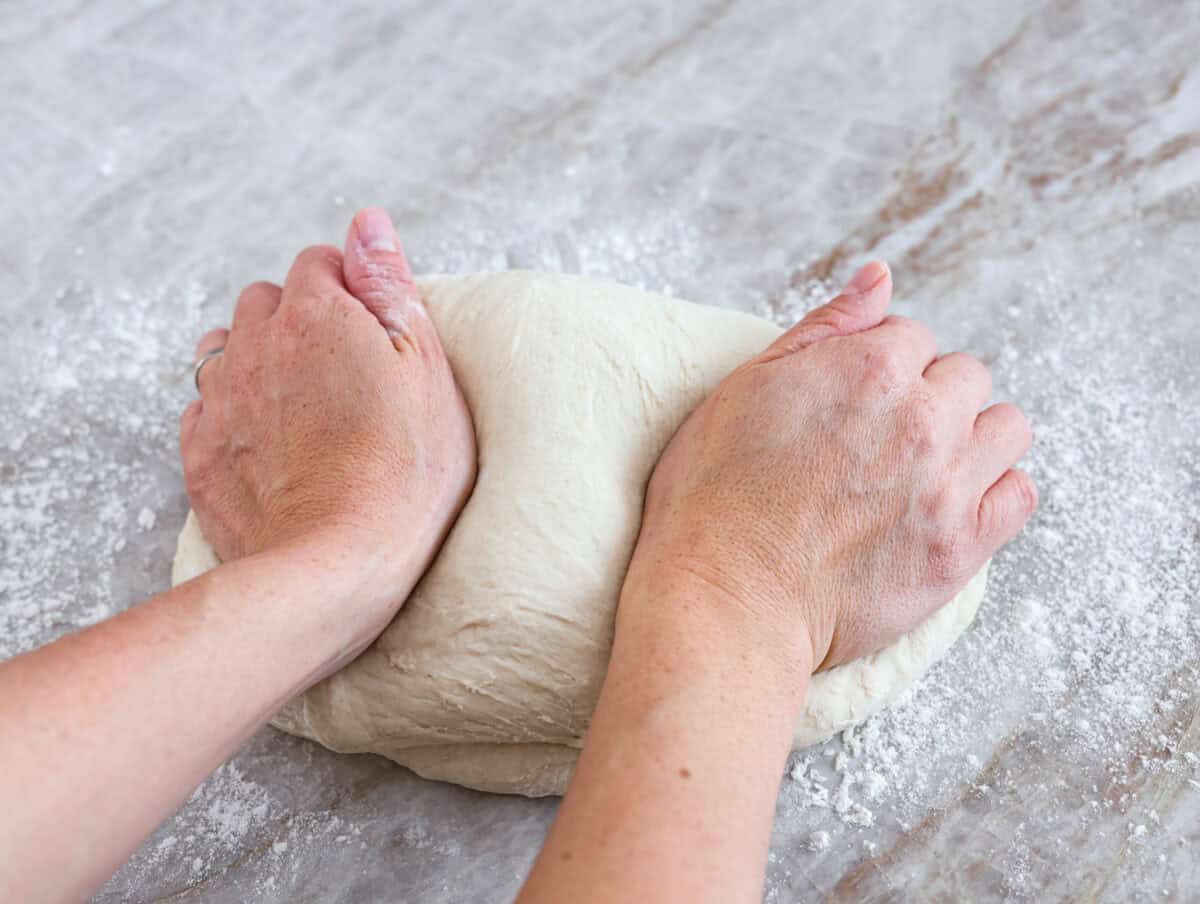
In the Stand Mixer: Once the ingredients come together, it’s time to knead the dough. I prefer to incorporate all my ingredients using a kitchen aid. Always use the dough hook attachment. A whisk or paddle will beat the dough up too much and shred the gluten strands as they try to form. Increase the speed of the mixer and let it mix and knead the dough for a few minutes. Knead By Hand: Dump the dough onto a lightly floured surface and work the dough with your hands to knead it. You will use the heels of your palms to gently push the dough away from you. Pull and stretch the dough back over itself toward you then push it back and away again. Keep some flour nearby to lightly sprinkle or dust on the loaf and keep your hands floured so they don’t stick too much to the dough. You will work your dough a few minutes, typically about 4 minutes or more until it stays together in a ball and develops a smooth surface.
What is the Right Consistency of Bread Dough?
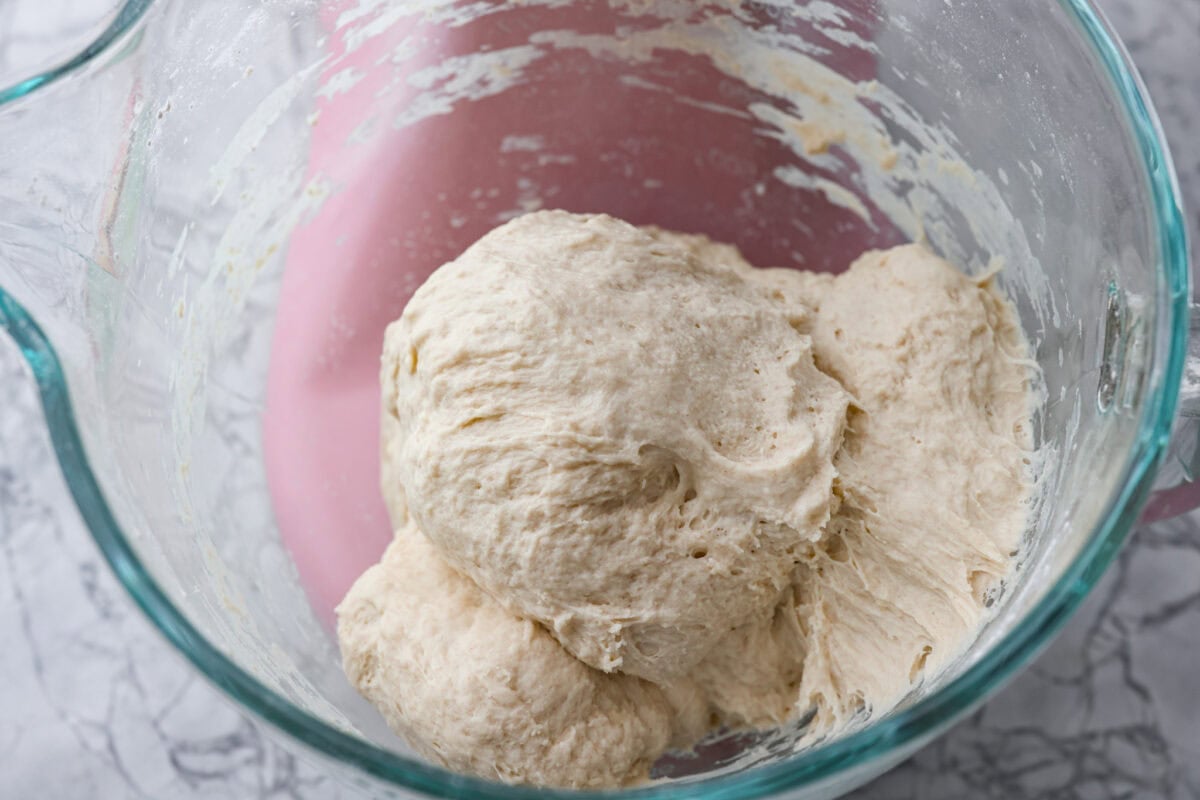
Let me help you find the right consistency for your bread dough! If you notice the dough is not pulling away from the sides of the bowl as the dough is mixing, then you will need to add in a little extra flour. Add a couple of tablespoons at a time until the dough pulls away from the bowl and cleans the bowl.
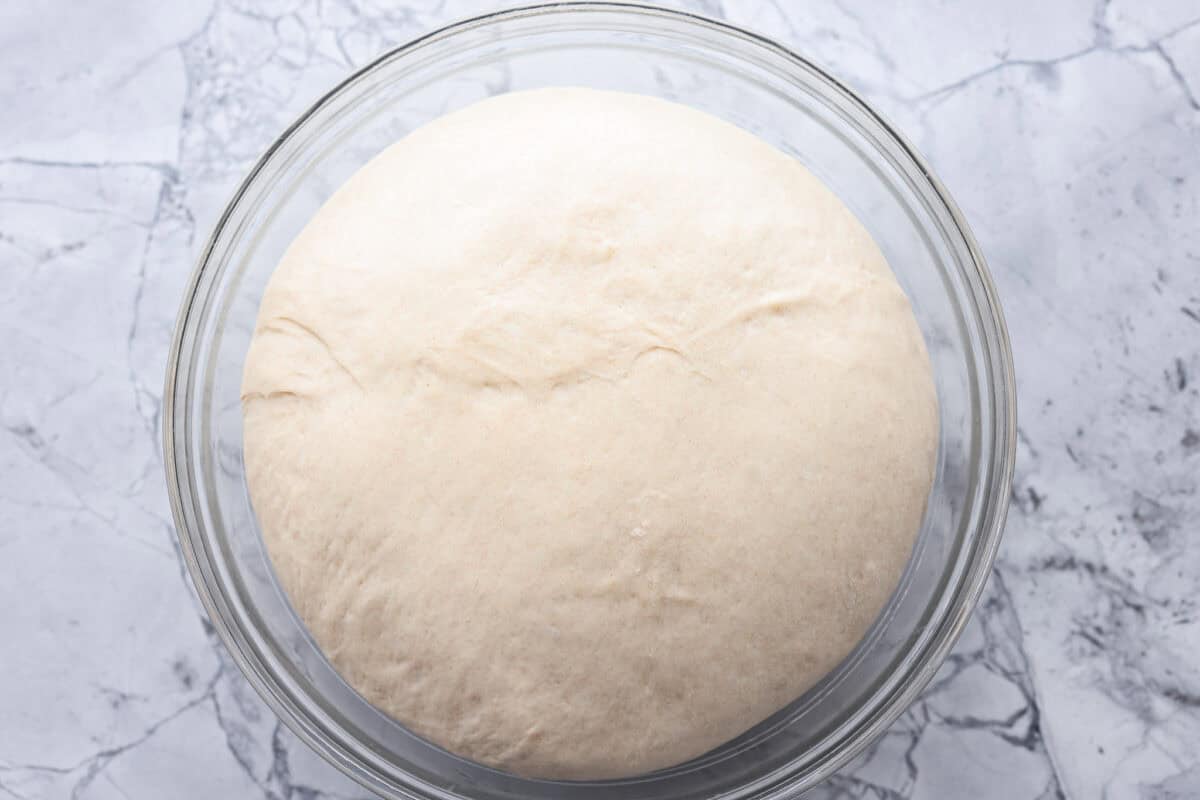
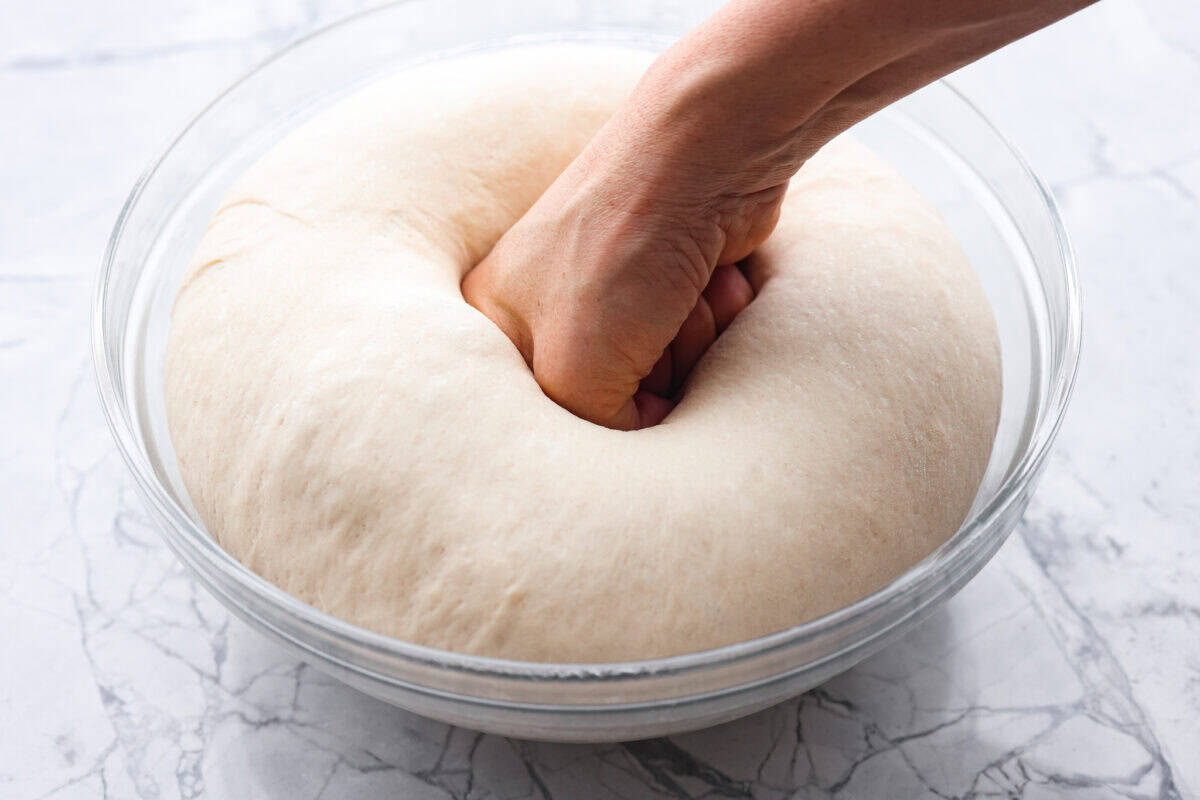
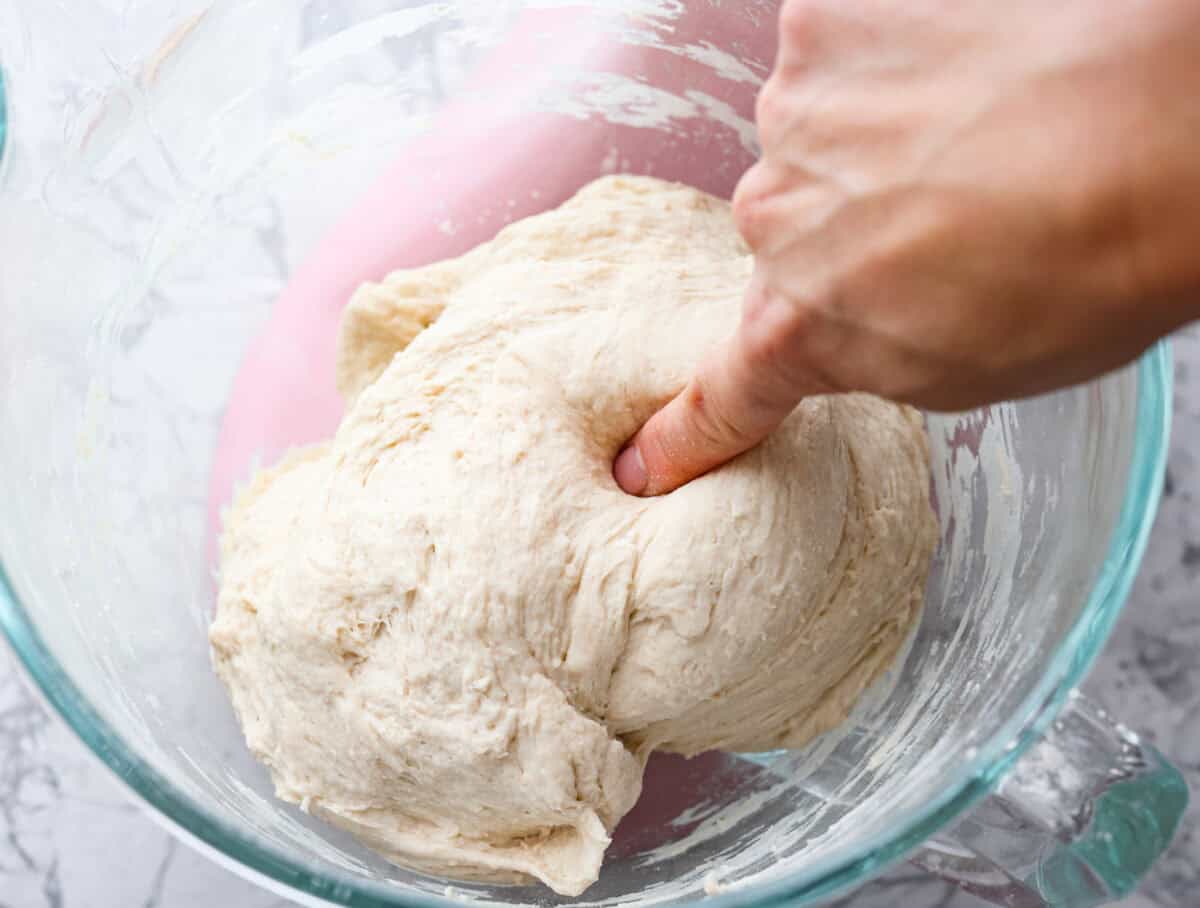
Sticky Dough: The dough should not stick to your hands too much. It should be expected to be a bit sticky and you will need to flour your hands and work surface until you have developed the gluten in the dough. Poke Test: You will know when a loaf is ready by doing a poke test. Lightly poking the loaf with your finger should leave a very slight indentation, it may spring back slightly, but you should still see where you poked.
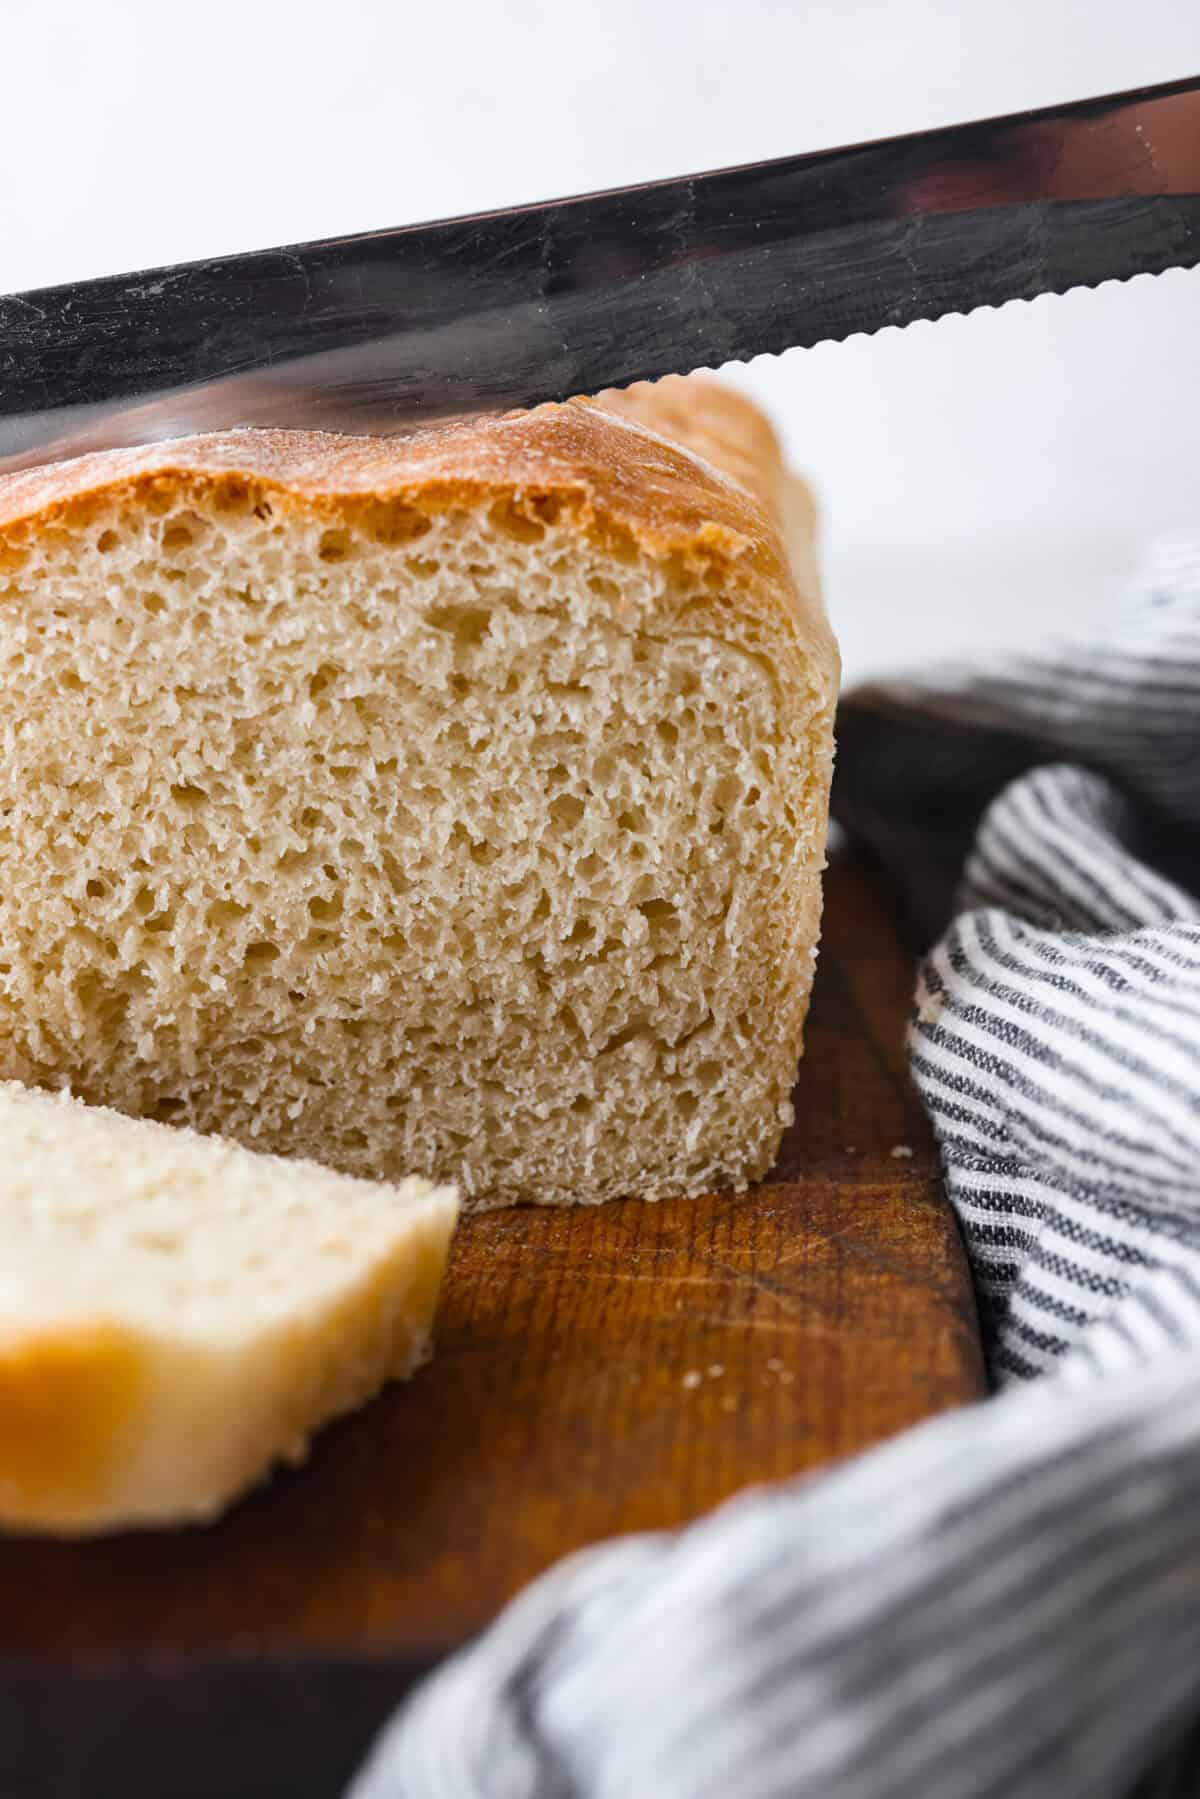
Yeast: Good yeast should look creamy and foamy once it is proofed. Regardless of the type of yeast you use, if your water reaches temperatures of 120°F or more, the yeast will begin to die off. Under-Proofed VS. Over-proofed: Lightly poke the dough with your finger, if a deep indentation is left your loaf is likely over-proved, if the dough bounces back and is still tight it is under-proofed. Room Temperature: The warmer the room temperature is in your home, the quicker the bread will rise. Always Use the Dough Hook: When using a stand mixer, use the dough hook attachment. A whisk or paddle will beat the dough up too much and shred the gluten strands as they try to form. Clean Bowl: Dough should pull free from the mixer. Once the dough comes together and leaves the bowl looking clean, then your dough is ready! How to know if the bread is fully cooked: To know if your bread is fully baked, use a food thermometer. A fully baked loaf will be about 190 degrees Fahrenheit. The top of the bread should be a light golden brown color. Serrated Knife: A serrated bread knife is the BEST knife to perfectly slice your bread.
At Room Temperature: Place the loaf of bread or sliced bread in a ziplock bag or airtight container. Make sure to seal it tightly, so air doesn’t get into the bag and dry it out. Keeping the bread unsliced until you are ready to eat is best. The bread should last about 5-7 days. In the Refrigerator: Storing the bread in an airtight container in the fridge will last about 7-9 days. In the Freezer: Bread freezes well, so I always make an extra loaf or two! Store it in an airtight container in the freezer for 2-3 months. Let it thaw overnight in the fridge before serving.
Japanese Milk Bread
2 hrs 30 mins
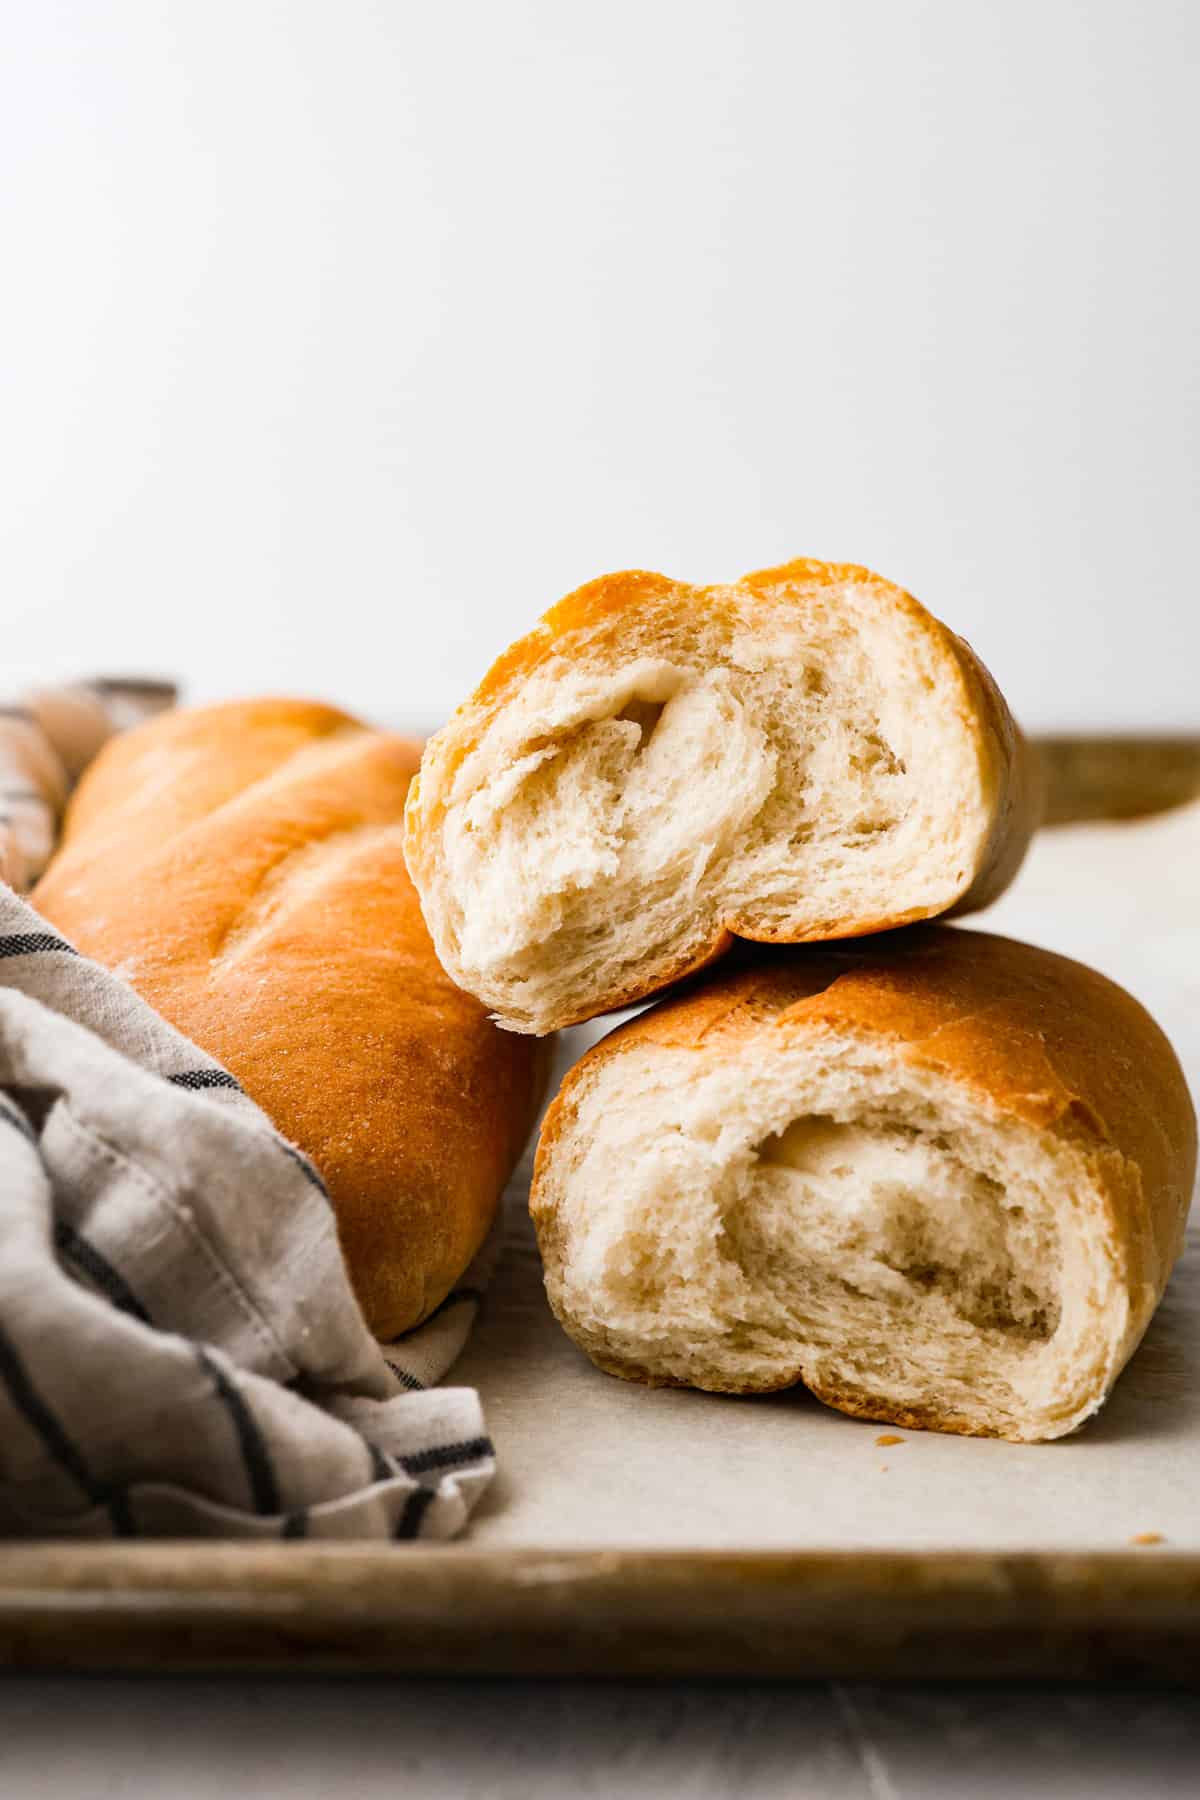
Italian Bread
3 hrs 10 mins
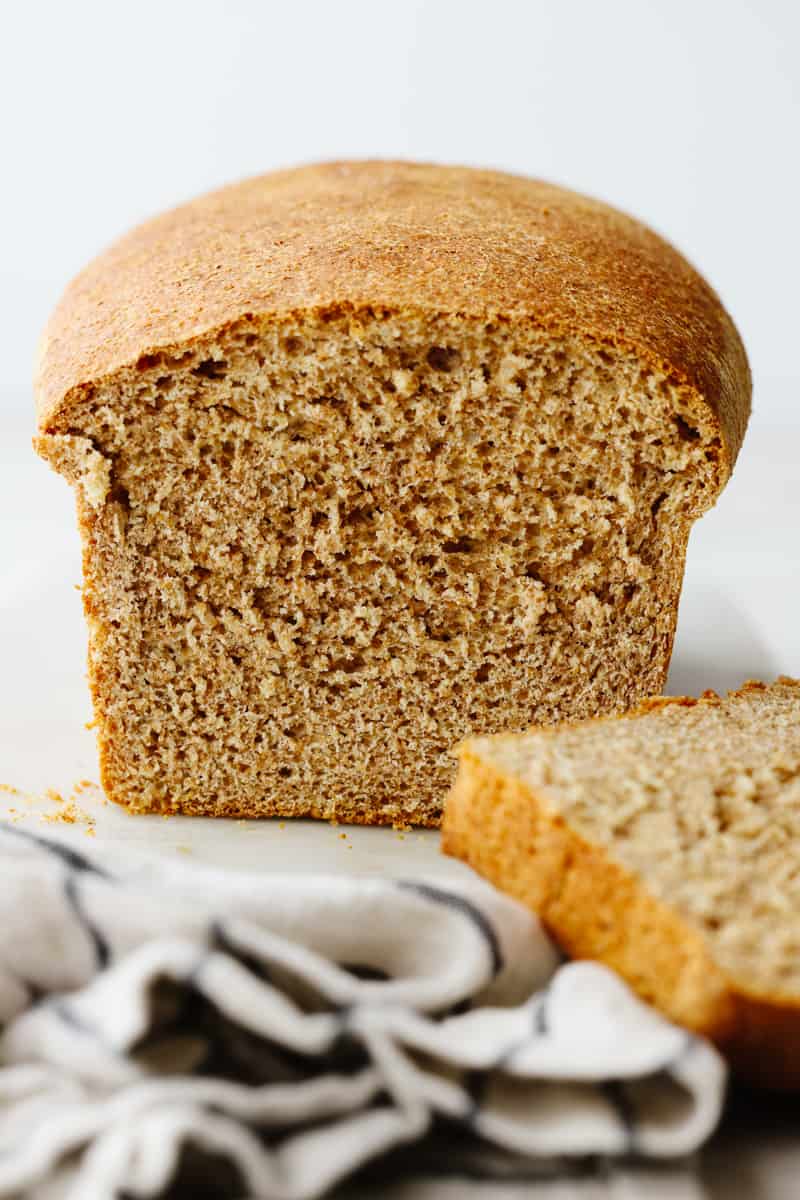
The BEST Whole Wheat Bread
3 hrs 5 mins
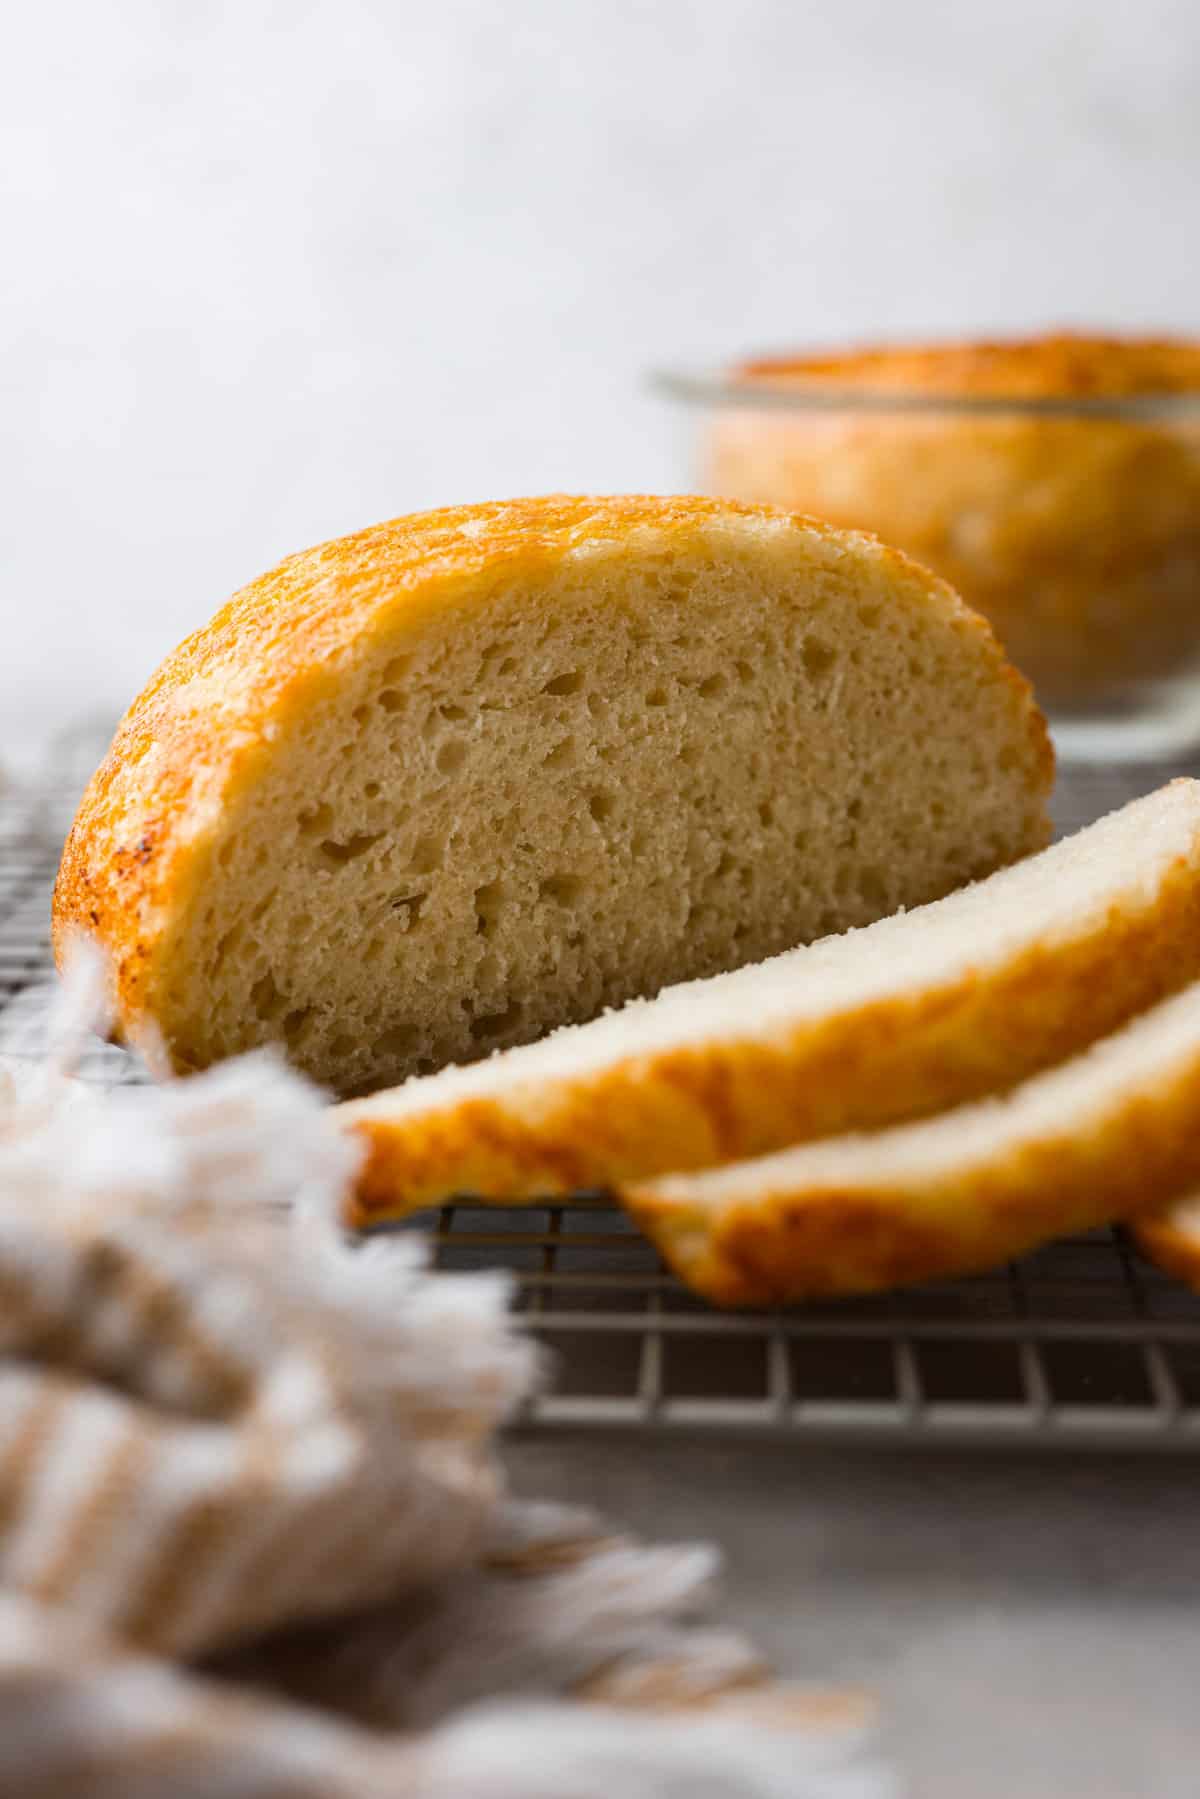
Peasant Bread
2 hrs 10 mins